Quickstart
In this guide, you will create an automated workflow that creates a new item on a monday.com board whenever a customer is created or updated in your Shopify store. This basic setup serves as a foundation you can extend to build more complex business logic and automations.
Create a workflow
Create a new workflow in monday.com. When prompted to pick a trigger, go to the Apps section, select the Shopify Connector, and choose the trigger When customer is created or updated.
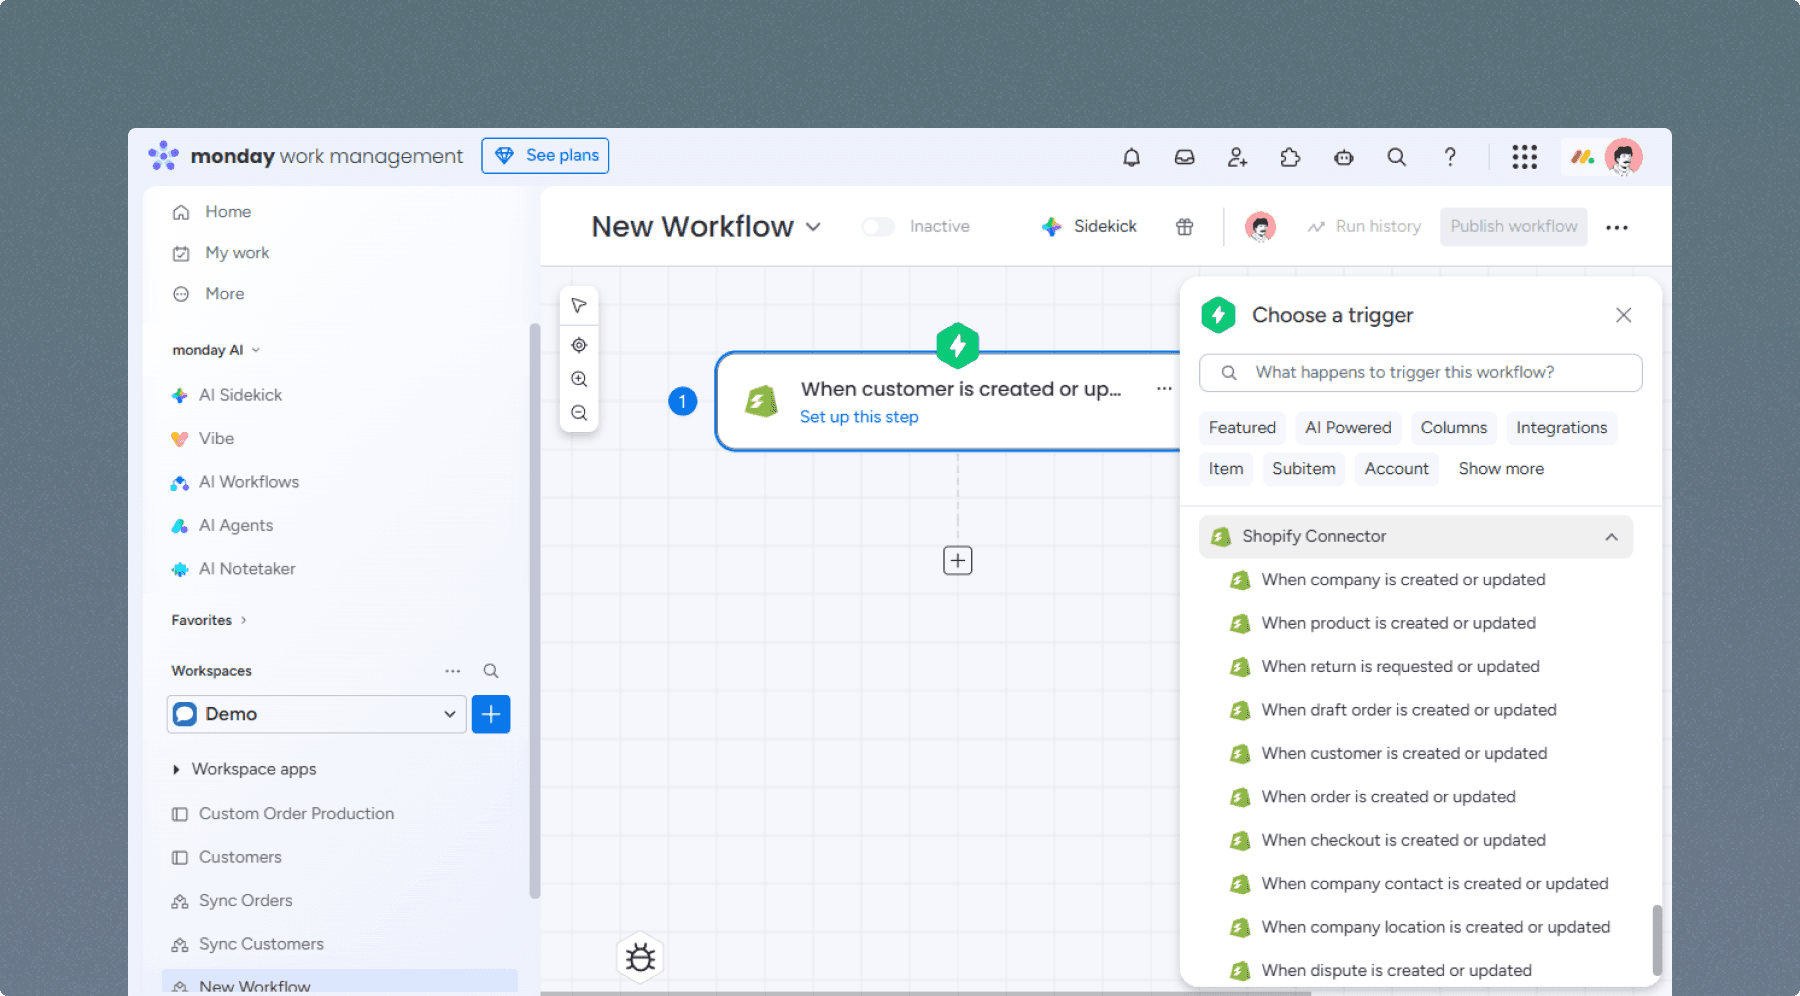
Select the Shopify Integration from the Apps menu and choose the "When a customer is created or updated" trigger to begin.
Configure the trigger
Click the trigger block to open the configuration panel. Select Choose Shopify store credentials → Add new account and enter your store domain. Click Continue to authorize the connection in Shopify; once finished, select your store from the dropdown menu.
You can also add an optional label here to help you identify this specific workflow trigger in the Shopify admin later.

Select your store from the drop-down menu and enter an optional label to identify this trigger later.
Add an action
Add a "Create item" action after your trigger. Select the board where you want new items created, and map the Shopify data fields to your board columns (e.g., map the Customer Name to the Item Name).

Map your Shopify data fields to the corresponding columns on your monday.com board.
Publish and test
Click Publish to activate the workflow. To test the connection, create a new customer in your Shopify admin; a corresponding item should appear on your monday.com board within a few moments.
That's it—your first workflow is up and running. Explore the full list of triggers in the automation center to discover more possibilities.